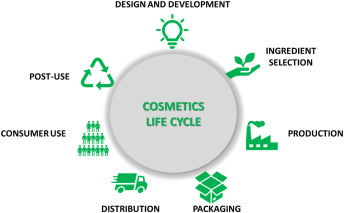
The cosmetic industry is highly competitive and innovation-driven, with aesthetics, functionality, and speed-to-market playing key roles. Central to this dynamic ecosystem is the cosmetic mould—a precision tool used to manufacture packaging components such as lipstick cases, compact containers, mascara tubes, and lotion bottles. The lifecycle of a cosmetic mould is a meticulous process that spans several stages, from initial concept to final production. Here’s an in-depth look at each stage:
1. Conceptual Design and Feasibility
The lifecycle begins with conceptual design, where product developers and industrial designers collaborate to create initial sketches or digital models based on market trends and consumer preferences. Key factors considered include:
Product shape, size, and ergonomics
Material selection (typically plastics like ABS, PP, PETG)
Decoration and branding possibilities (e.g., surface finishes, hot stamping, embossing)
Functional requirements (airtight seals, locking mechanisms)
Once a design is drafted, a feasibility study is conducted to determine whether it can be manufactured cost-effectively and within technical constraints.
2. CAD Modeling and Engineering Design
Once the design is validated, it moves to the Computer-Aided Design (CAD) phase. Engineers develop highly detailed 3D models of both the cosmetic product and its corresponding mould.
This stage includes:
3D modeling of part geometry
Draft angle analysis (to ensure easy ejection from the mould)
Shrinkage allowance (especially for plastic materials)
Mold flow analysis (to simulate how molten plastic will fill the cavity)
Design for manufacturability (DFM) principles are applied to ensure that the final mould will produce consistent, defect-free parts.
3. Mould Tooling Design
Tooling engineers then design the mould base and core-cavity inserts. Cosmetic moulds can be complex, often requiring multi-cavity tools, hot runner systems, and intricate parting lines for high production efficiency and surface finish.
Key decisions made during this stage:
Type of mould: single-cavity, multi-cavity, or family mould
Steel grade selection (P20, H13, S136, etc.)
Cooling system layout to reduce cycle times
Ejection system (pins, sleeves, or lifters)
Surface treatment for polish or texture
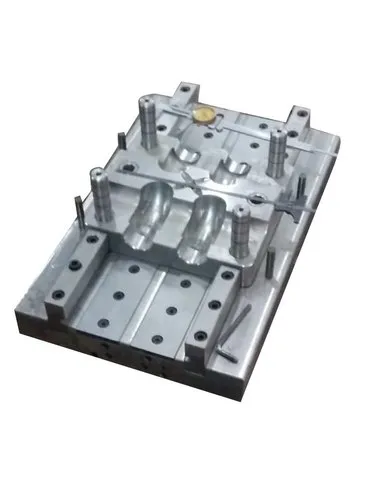
4. Mould Manufacturing (Tooling Fabrication)
This stage involves precision machining using CNC (Computer Numerical Control), EDM (Electrical Discharge Machining), and grinding processes to manufacture the mould components.
Steps include:
Rough machining of the steel blocks
Precision milling and EDM for core and cavity formation
Heat treatment to harden the mould steel
Surface finishing and texturing (mirror polish or matte finishes as needed)
Assembly of all components into a complete mould set
Tolerances are extremely tight (often within ±0.01 mm) to ensure the cosmetic parts have a flawless finish.
5. Trial and Validation (T1, T2 Samples)
Once the mould is assembled, it undergoes a series of trial runs, typically known as T1, T2, and sometimes T3 sampling phases.
T1 Trial: First trial to assess basic part geometry and identify defects like flash, short shots, or sink marks
T2 Trial: Incorporates changes from T1, focusing on cosmetic quality, fit, and function
T3 (if needed): Final fine-tuning and texture adjustments
The goal is to validate that the mould can reliably produce parts to specification under real production conditions.
6. Production and Quality Control
With the mould approved, it moves to mass production, often on fully automated injection moulding machines. Moulds are cycled thousands to millions of times, producing high-quality parts at a consistent rate.
Key aspects of this stage:
Routine maintenance and cleaning to extend mould life
Quality checks for dimensional accuracy, surface finish, and functionality
Monitoring of cycle times and scrap rates
High-volume cosmetic production demands not only accuracy but also aesthetic excellence, as the packaging directly influences consumer purchasing decisions.
7. Maintenance and End-of-Life
Cosmetic moulds are capital-intensive assets, so preventive maintenance is essential to extend their lifespan.
Maintenance tasks include:
Lubricating moving parts
Polishing worn surfaces
Replacing worn-out components (e.g., ejector pins, O-rings)
Eventually, a mould reaches its end-of-life—either due to wear, design obsolescence, or changing product lines. At this point, it may be retired, refurbished, or replaced.
Conclusion
The lifecycle of a cosmetic mould is a blend of creativity, engineering, and precision manufacturing. Each phase, from design to production, contributes to the ultimate goal: delivering beautifully crafted packaging that enhances brand identity and captivates consumers. By understanding this lifecycle, brands can better manage lead times, costs, and product quality—crucial elements in the fast-paced cosmetics industry.